10. RViz Integration
RViz Integration
In this section, you will display your model into RViz and visualize data from the camera and lidar sensors. You will also actuate your robot and drive it around!
Modify robot_description
Start by modifying the
robot_description.launch
file. Open it and add these lines after the first
param
definition.
  <!-- Send fake joint values-->
  <node name="joint_state_publisher" pkg="joint_state_publisher" type="joint_state_publisher">
    <param name="use_gui" value="false"/>
  </node>

  <!-- Send robot states to tf -->
  <node name="robot_state_publisher" pkg="robot_state_publisher" type="robot_state_publisher" respawn="false" output="screen"/>
Those elements add two nodes - the joint_state_publisher and the robot_state_publisher .
-
joint_state_publisher: Publishes joint state messages for the robot, such as the angles for the non-fixed joints. -
robot_state_publisher: Publishes the robot's state to tf (transform tree). Your robot model has several frames corresponding to each link/joint. The robot_state_publisher publishes the 3D poses of all of these links. This offers a convenient and efficient advantage, especially for more complicated robots.
Modify
world.launch
Next, you need to launch RViz along with Gazebo. Open the
world.launch
file and add these elements after the
urdf_spawner
node definition:
<!--launch rviz-->
<node name="rviz" pkg="rviz" type="rviz" respawn="false"/>
This will create a node that launches the package
rviz
. Let's launch it 🚀
Launch!
$ cd /home/workspace/catkin_ws/
$ source devel/setup.bash
$ roslaunch my_robot world.launch
This time both Gazebo and RViz should launch!
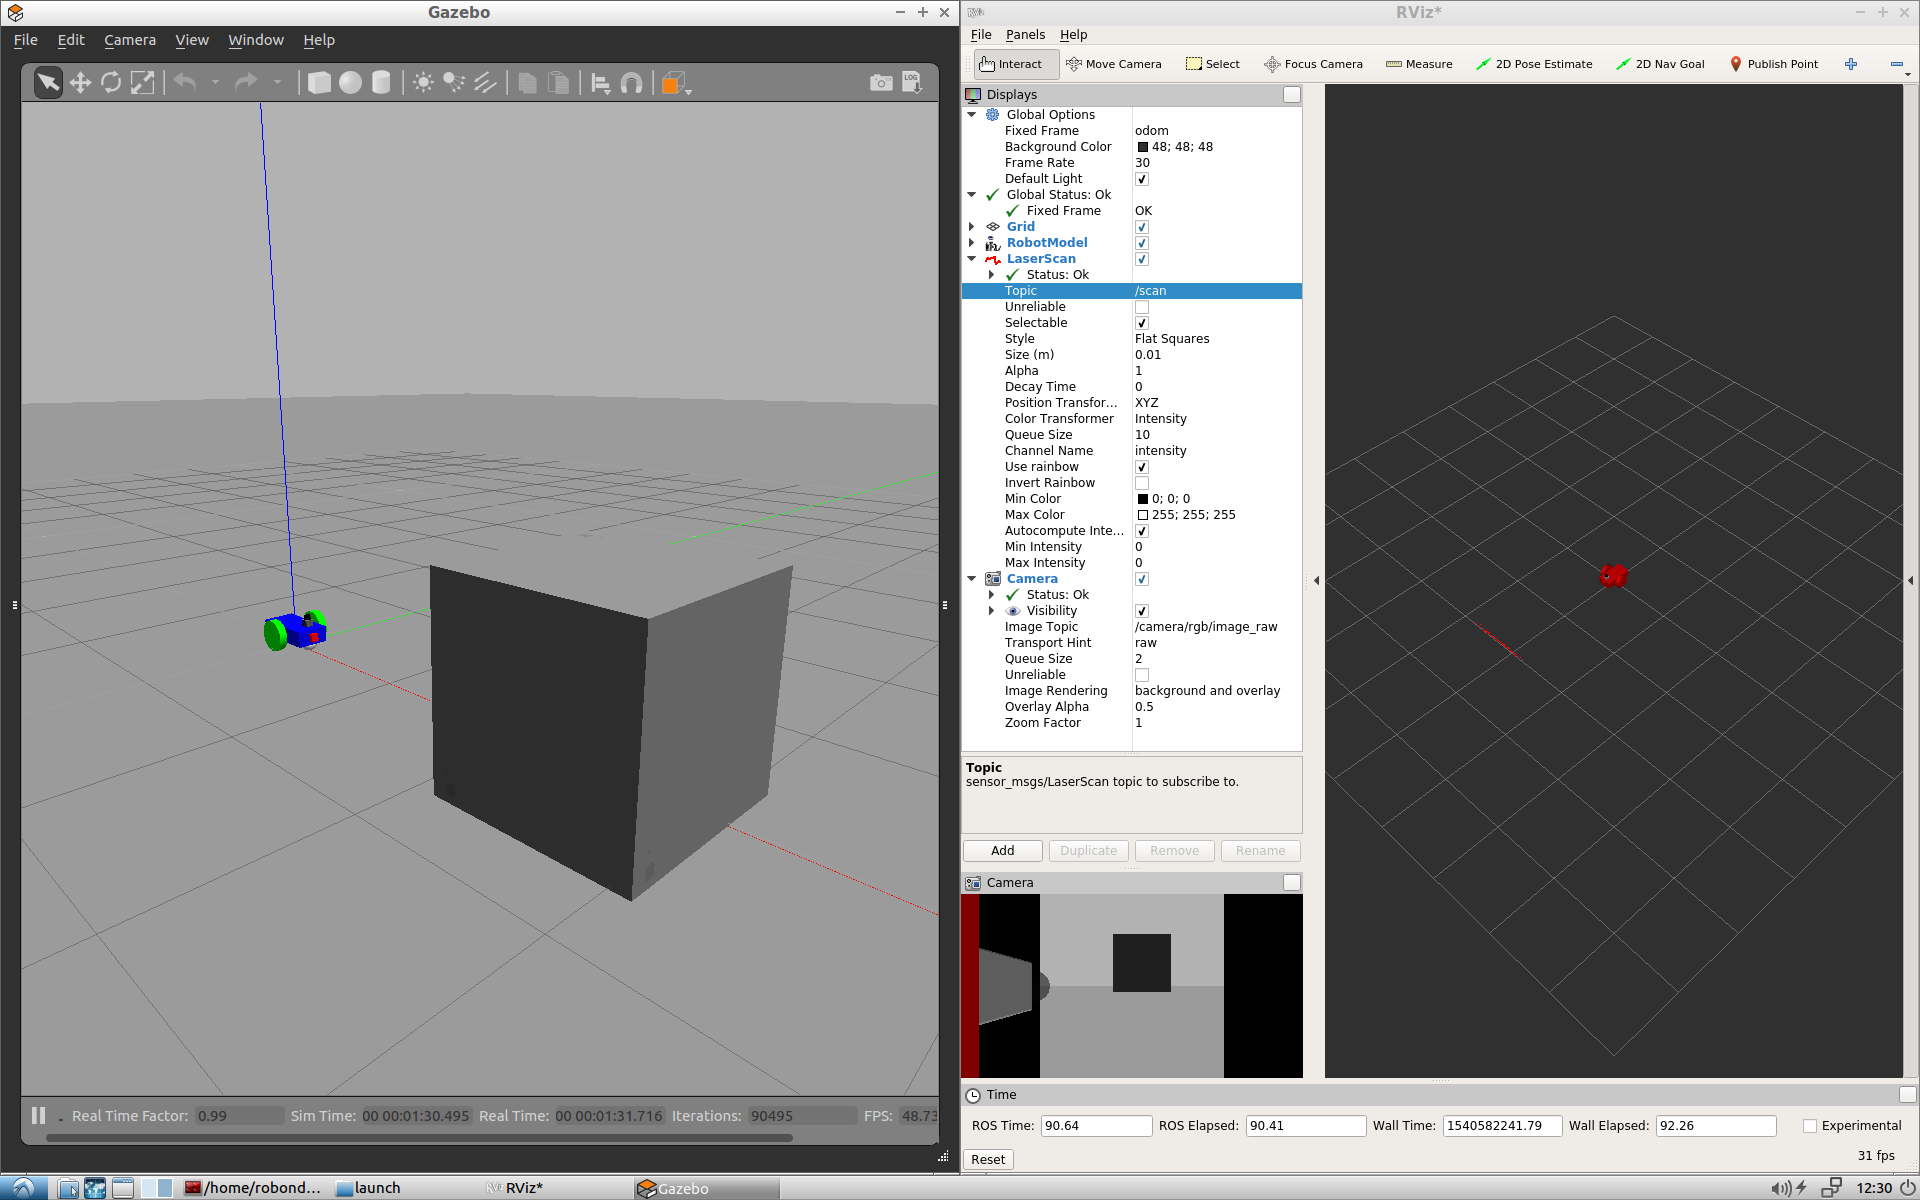
RViz Setup
Setup RViz to visualize the sensor readings. On the left side of RViz, under
Displays
:
-
Select
odomfor fixed frame -
Click the
Add
button and
-
add
RobotModeland your robot model should load up in RViz. -
add
Cameraand select the Image topic that was defined in the camera Gazebo plugin -
add
LaserScanand select the topic that was defined in the Hokuyo Gazebo plugin
-
add
Add Objects
In Gazebo, add a box, sphere or cylinder object in front of your robot. Your robot’s sensors should be able to visualize it. You can check the
Camera
viewer on the bottom left side of RViz to see a picture of the new object. Also, you can see a red
Laser
scan inside the scene, reflecting from your object.
Drive Around
While everything above is still running, test the robot’s actuators and drive it around. Open a new terminal window and publish velocity commands to the robot’s wheel actuators:
$ cd /home/workspace/catkin_ws/
$ source devel/setup.bash
$ rostopic pub /cmd_vel geometry_msgs/Twist  "linear:
  x: 0.1
  y: 0.0
  z: 0.0
angular:
  x: 0.0
  y: 0.0
  z: 0.1"
This command publishes messages to
cmd_vel
, a topic which was defined in the drive controller plugin. The values set for
linear.x
and
angular.z
will enable the robot to start moving in a circle!
Task Description:
Follow these steps to test the robot’s sensors and actuators with RViz:
Task Feedback:
Great job!